HDD Removal Insturctions for IBM & Lenovo Desktop Computers
Before you start: Remove any media (diskettes, CDs, or tapes) from the drives, shut down your operating system, and turn off all attached devices. Remove any locking devices such as a padlock or Kensington lock that secure the computer cover.
ThinkCentre A53, A55, A60, M55e
3000 J100, 105, J110, J115 / ThinkCentre E50, E51
Hard drive removal - for ThinkCentre A53, A55, A60, M55e
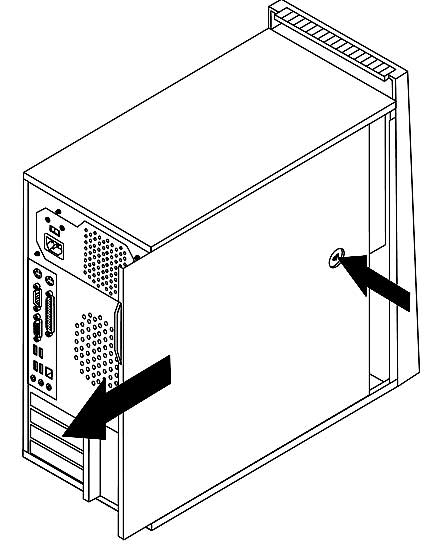
1. Remove the cover of the computer case:
- Press the cover-release button on the right side cover, slide the cover to the rear, and remove.

2. To remove the hard drive:
- Disconnect the signal and power cables from the hard drive.
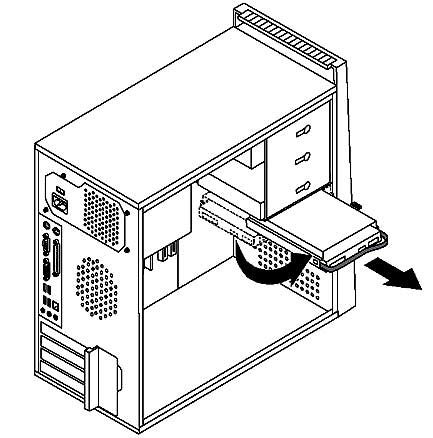
- Press the release tab, pull back the hard drive bay, and pivot the hard drive outward to avoid the heat sink when removing the hard drive.
- Use the blue handle to remove hard drive from drive bay.

Hard drive removal - 3000 J100, 105, J110, J115 / ThinkCentre E50, E51
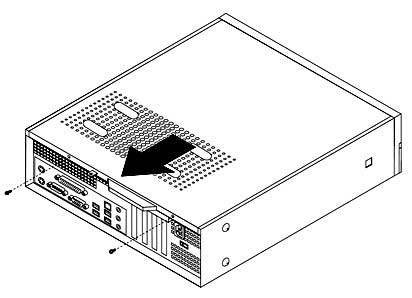
1. Remove the cover: Remove the two screws at the rear of the computer cover and slide the cover to the rear to remove.

2. Remove the drive bay assembly.
- Remove the front bezel by releasing the three tabs and pivoting the top of the bezel outward.
- Remove the two screws at the front of the chassis securing the drive bay assembly.
- Slide the drive bay assembly forward until it stops.
Disconnect the power supply and signal cables from the drives.
Pivot the rear of the drive bay assembly upward to remove it completely from the computer.
Note: To allow easier access to the cables, lift the fan plenum off the heat sink.

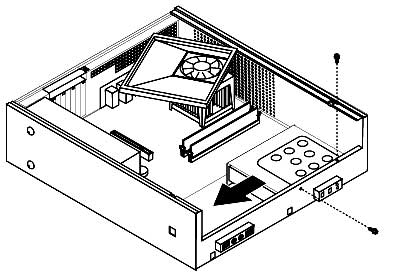
- Remove the two screws that secure the hard drive bracket.
- From the front of the chassis, slide the drive bracket to the left until it is free of the retaining clips in the bottom of the chassis. It can now be can be removed from the chassis.
Disconnect the signal and power cables from the rear of the hard drive. - Remove the four screws that secure the hard drive to the bracket and remove the drive from the bracket.

After drive was removed, carefully look at it. You may find few attached things that are not parts of the drive. Do not forget to remove and retain for future use all brackets and connectors or SATA adaptors from the drive, because they a not needed for data recovery process. Keep them for the new drive installation.